How to Exit X to Social Network Sovereignty

Earlier this year I wrote an essay about a new messaging protocol called nostr (Notes and Other Stuff Transmitted by Relays.)

I've been an avid nostr user for a year now, and I've simultaneously been witnessing and pointing out the decline of X (Twitter) throughout the same time.
My Twitter engagement metrics are down ~70% across the board since Musk took over.
— Jameson Lopp (@lopp) June 29, 2023
Your Audience is not Truly Yours
Almost everyone who uses social media these days is at risk. Not only can their account be shut down at a whim by third parties, they can effectively be deplatformed by having their entire audience taken away, since audiences are not portable between different social networks.
Until recently, the only way one could really have an audience that they could defend against losing would be via email. That is - even if you email service provider shuts down your account, it's not a big deal - you can easily move your list of subscribers to an account with a different provider.
Now, we have a social networking protocol that empowers its users with those same attributes!
Achieving Social Media Sovereignty
Sovereignty means that you're in a position that is defensible; AKA you are not reliant upon the whims of third parties that can disempower / deplatform you. When it comes to Bitcoin sovereignty, this is achieved by taking control of your own private keys and verifying the state of the ledger with your own fully validating node.

How can one attain a similar position of strength when it comes to social media? By holding your own keys and running your own server!
The following is a guide for how to migrate your historical tweets over to nostr, where you can secure your "account" via cryptography and ensure the persistence of your data by running your own server. Depending upon your technical skills, there are several paths you can take, each with their own trade-offs.
1A. Export your tweets
Request an account data export from X. This can take several days for them to process and provide you with a compressed archive of your tweets.


1B. Export your notes
You can skip this if you haven't already been posting notes to nostr. If you have been using nostr then you'll want to ensure that all of your historical notes get migrated to the new relay you're going to set up.
Open a browser tab to https://nostrsync-l8w5xczua-iefans-projects.vercel.app/ (source code at https://github.com/iefanx/NostrSync)
Paste your nostr public key (starts with "npub") into the text field and click "Backup & broadcast."
After the backup has completed, click the "LocalDatabase" button and then download the js file that will contain a list of all of your notes. Save it as "nostr-sync.js"
2. Set up client, create a nostr key
If you've never used nostr, first you need to decide what client(s) to use and generate a private key. Make sure you create secure backups of this key so that you don't lose it - just like with bitcoin, if you lose a key then your access is permanently lost! Similarly, if the key falls into someone else's hands, they can impersonate you and you won't be able to stop them.
For a good setup guide, visit https://nostr.how/en/get-started
3. Set up / connect a lightning wallet
A major feature of nostr is the fact that the protocol has support for Lightning Network payments. You'll really be missing out if you don't configure your profile and client to use a Lightning wallet.
For a good setup guide, visit https://nostr.how/en/guides/setup-zapping-wallet
4. Install nos2x
In order to import our tweets later (and to make using web app nostr clients easier) we'll need to have the nos2x Chrome extension installed and managing our nsec (nostr private key.) You can install the extension here.
5. Set up a reliable relay
Here's where the process gets more complex and you have some decisions to make.
If you're a non-technical user who wants to increase the robustness of your data persistence, you can outsource the actual running of the relay to a third party and incentivize (pay) them not to delete your old notes. But note that you still bear the risk of being rugged; it's (hopefully) less likely since you're paying for the service. Free relays are more likely to delete your old notes to reduce their ongoing maintenance costs.
Non-technical users can pay for long-term note storage at https://cellar.nostr.wine/
Alternatively, you can pay to have a dedicated relay run by a third party at https://relay.tools/signup
Advanced users who are willing to put in more work to achieve the ultimate level of sovereignty by hosting your own relay need to choose a relay implementation to run.
Consensus at time of writing seems to be strfry for relay running, so that's what I'm using. The rest of this section will be dedicated to setting up strfry; the official strfry deployment documentation can be found here.
First, set up a server with the hosting provider of your choice. You don't need much in terms of resources; I chose one with 2 CPU cores, 2 GB of RAM, and 50GB of disk space.
Create a DNS A record that points to the server's IP address. Something like "nostr.yourdomain.com"
Note that while strfry's documentation says you only need 2GB of RAM on your server, I had issues building strfry on a server with such restricted memory. Unfortunately, there are not prebuilt binaries available at time of writing. So I ended up having to build the binaries on my laptop and transfer them to the server. I can confirm that the software runs fine with only 2 GB of RAM.
Make sure you edit strfry.conf and set all the variables in the "info" section. It's also worth noting that the strfry nostr relay has a configuration value:
rejectEventsOlderThanSeconds = 94608000
The default value is equivalent to 3 years. So if you're planning on importing a 15 year history of tweets like I did, you'll want to set this value to
rejectEventsOlderThanSeconds = 600000000
You'll also want to set up a systemd service and reverse proxy for your relay. The systemd service is just to ensure uptime in the event that your machine crashes / reboots. The reverse proxy is so that you can set up an SSL certificate and encrypt your network traffic between the client and relay.
There's a good systemd service example here. I'll note that I got stuck setting up systemd for a while as I kept getting a kinds of odd failures with unhelpful error messages. I'd recommend if you have issues to watch the systemd log output via
journalctl -u nostr-relay.service -fThis led me to discover an error occurring with the open file limits:
strfry error: Unable to set NOFILES limit to 1000000, exceeds max of 65536Which I fixed in my strfry.conf by setting: nofiles = 0
Next, the strfry reverse proxy example is here and there's more good reverse proxy documentation here.
Finally, follow these directions to issue an SSL certificate and configure nginx to use it.
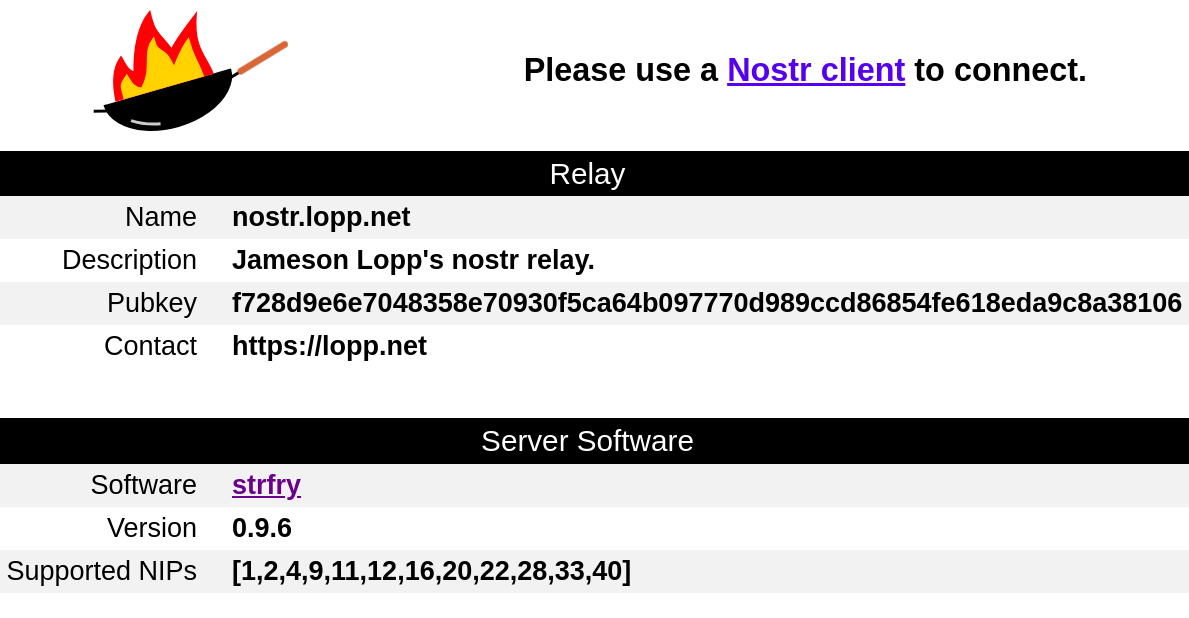
Once you have everything running, you can check to make sure the configurations are correct by visiting your nostr relay domain in your web browser; you should see a page like this:
Finally, this is optional, but if you want to ensure that ONLY you can publish events to your relay, you should configure a whitelist. Strfry has documentation for doing that here.
6. Configure your client to use the relay
This step will vary depending upon which client you're using to access nostr. Note that the value will need to be in the form of: wss://nostr.yourdomain.com
7A. Import your historical tweets
There's a user friendly tweet import tool at https://exit.pub/
After playing around with this tool quite a bit, I have several warnings and suggestions.
- If you have multiple nostr compatible browser extensions installed, disable all but one. I was mystified for quite a while because exit.pub was generating notes with invalid signatures. Eventually I determined that it was because it was reading a nostr pubkey from my Alby extension (which had autogenerated a key I never use) but was then signing with my real key via my nos2x extension.
- I ran into an issue a few times where exit.pub somehow failed to read my public key from nos2x and the only way to fix it was the clear my browser cache for the site.
- You probably only want to publish these really old events to your own relay, as other relays are going to be less performant and more likely to reject your notes, causing the migration tool to come to a halt if it sees too many errors.
Note that exit.pub says to upload the tweets.js file from the archive; you can find it in the "data" folder of your archive zip file.
Once you upload your tweets.js file, it will take a minute or two to parse your history. Then it will ask you to select what type of tweets to import. I'd suggest choosing "threads" and "OP tweets" - replies and retweets will be a bit out of context and possibly nonsensical to migrate over.
For simplicity you'll probably want to disable the payment related options. Make sure you add your relay's domain into the relays text box at the bottom and click update.
However, at time of writing, exit.pub is not very optimized and pulls the entire data set into memory. If you have too many tweets (more than a couple thousand) in your tweets.js file then your browser will crash due to running out of memory and the import will fail. If this occurs, you need to split up your tweets.js archive into multiple chunks. Thankfully this isn't difficult, just a few lines of javascript. To accomplish this, change line 1 of tweets.js to the following:
let tweets = [Then, add the following code snippet at the very bottom of tweets.js and save the file.
const fs = require('fs');
let chunk = 1;
while (tweets.length) {
  let subset = JSON.stringify(tweets.splice(0, 2000));
  fs.writeFile('./tweets_chunk' + chunk + '.js', 'window.YTD.tweets.part0 =' + subset, err => {
    if (err) {
      console.error(err);
    }
  });
  chunk++;
}
You will need to have Node.js installed. Now, from the command line, run:
nodejs tweets.jsYou'll see a bunch of new files appear in this directory, with numbered names like "tweets_chunk1.js" - now you can upload each chunk into exit.pub.
Once you click "preview" you can then click "publish" at which point a nos2x dialog will pop up and ask if you want to allow access to your private key to sign events. Click "authorize forever" and the migration will begin. In my experience it takes about a second per tweet to sign and upload to your relay.

If you want to be sure that the tweets are being imported, just tail your strfry logs on the server via:
journalctl -u nostr-relay.service -f7B. Import your historical notes
If you exported notes earlier in step 1B then we'll need to do some data transformation to prepare the notes to be imported into our relay. Open the nostr-sync.js file you downloaded with a text editor, scroll all the way to the bottom, paste these 3 lines, then save the file.
for (let note of data) {
  console.log(JSON.stringify(note))
}
You will need to have Node.js installed. Next, run this command to create the jsonl file we can import into strfry:
nodejs ~/path/to/nostr-sync.js > ~/path/to/nostr-sync.jsonlUse your favorite file transfer client to copy the .jsonl file to your nostr relay machine.
scp /path/to/nostr-sync.jsonl nostr.yourdomain.com:~/Now SSH to the relay machine and actually run the import:
cat ./nostr-sync.jsonl | /path/to/strfry import --show-rejectedIt only took my machine 24 seconds to import 25,000 notes. You may see some rejected events because the nostrsync archive service grabs not only the notes you have published, but also notes published by others that interact with your pubkey. Thus there may be some large spammy notes in there that you don't actually care about. You might also see a lot of rejections if you have set your strfry whitelist to only accept notes from your pubkey. You might want to disable the whitelist when you perform this import, assuming you want to store all the notes from other people who have interacted with you historically.
8. Find your friends
At this point you've migrated your history, but unfortunately it's not so simple to migrate your audience / social circle.
Find your Twitter friends on nostr at https://nostr.directory/
Find trending accounts, topics, and posts at https://nostr.band/
You can also find trending posts at https://primal.net/
Find nostr communities at https://satellite.earth/
9. Celebrate and spread the good word!
If you're using nostr, you're an extremely early adopter since only ~20,000 people are actively using it at time of writing.
Like every network, there's a challenging period of bootstrapping adoption in order to achieve a critical mass such that network effects can take over and virally encourage more folks to join.
You can use https://onboardstr.vercel.app/ to help your friends get bootstrapped and automatically follow the same accounts you follow.
Welcome to social media sovereignty, fellow nostrich!