How to create a BitGo Wallet with Mycelium Entropy generated keys

BitGo provides a secure non-custodial Bitcoin wallet using our P2SH Safe Address multisignature technology. While we offer the convenience for users to generate their wallet’s keys in the browser, it is more secure to generate your backup key offline so that at no point in time do multiple keys exist on a single machine. The Mycelium Entropy is a device that makes it easy to do just that!
If haven’t already done so, you’ll need to configure your Entropy to generate BIP39 mnemonics that can be used to seed BIP32 (Hierarchical Deterministic) wallets. You can follow these steps:
- Insert Entropy into your computer’s USB port while holding down the button on the end of the Entropy. The computer will mount a new drive.
- Open up the settings.txt file on the drive.
- Find the line that reads: #hd
- Delete the ‘#’ character so that the line now only reads: hd
- (Optional) Now is also a good time to set a salt for extra security — find the line that starts with “#salt1,” delete the ‘#’ character, then add a random hexadecimal (0–9, A-F) string of 1–32 characters so that it looks like: salt1 9EF76A4C8D73422BCB2EDA89
- Save the settings.txt file.
- Instruct your computer to eject/unmount/safely remove the drive.
- Remove the Entropy from your computer’s USB port.
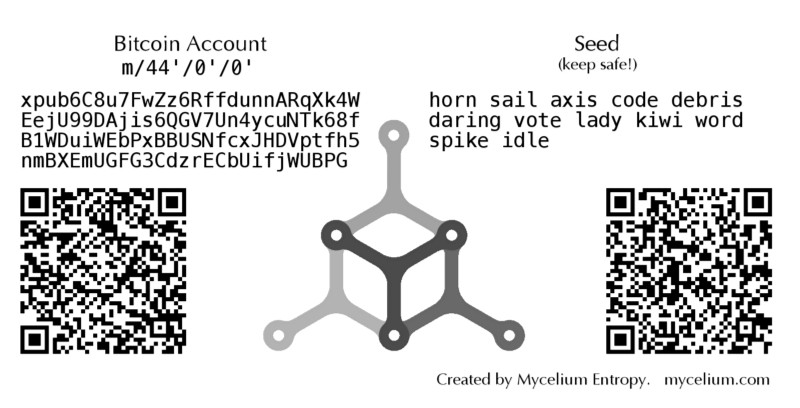
Once your Entropy is configured to generate HD seeds, you can plug it into your printer to safely generate and print your new seed. Be sure to follow Mycelium’s security guidelines.
- Insert the Entropy into your printer’s front USB port, the one typically used to print photos from thumb drives and USB cameras.
- When the seed image is detected, select the image and hit print.
After printing your seed, create your BitGo wallet with the following steps:
- Log in to your BitGo account
- Click on “Create Wallet”
- Name your wallet
- Select “provide public key” and paste the xpub from your Entropy-generated HD seed. To get the xpub onto your computer, you can scan the xpub QR code on the left side of the Entropy printout with a mobile phone app such as Barcode Scanner and then email it to yourself. However, note that sending an xpub over the Internet in cleartext means that an attacker who intercepts the xpub could view your wallet balances (but not spend them.) A more secure option is to save the xpub as a Secure Note on your phone with LastPass and then open it on your computer.
- Set a strong password for your wallet. LastPass is also a great tool for generating and storing secure passwords.
- Download the BitGo wallet keycard and activate your wallet using the activation code in the upper right of the keycard PDF. Be sure to back up both your BitGo keycard and Entropy seed in multiple secure locations!
Congratulations, your new BitGo wallet is ready to use!